How To Export Audio Tracks from DAW
When we capture a song, we mostly open the DAW to access our recordings. The DAW is where we find our individually recorded instrument and vocal tracks. Modern DAWs have this fantastic feature where we can export all the tracks as individual audio files and save it to a hard drive.

We’d want to export the individual tracks for mainly two reasons:
- To save the individually processed audio files/stems once you are ready with the mix or
- To send the recorded multitrack for further pocessing.
In this article we cover the steps to export the tracks in the following 3 DAWs:
- Pro Tools First
- Garageband
- Logic Pro
Tracks vs Stems
Tracks are individual mono or stereo instruments in the DAW, while stems can be thought of as group of instruments.
Think of Beatles. When they recorded their songs in London in the 1960’s, they only had 8 tracks available! It was a physical recorder, not a computer. What you do is record the drums on 6 channels, adjust the faders/EQ and assign these channels to the last 2 tracks and re-record them. You will end up having a mixed stereo drum track and now 6 newly available channels to record the additional instruments to.
Some skilled musicians or recording engineers prefer to pre-mix their songs before they send it away for mixing. For example, bouncing down 10 violin microphones to a stereo track for ease of use and simplicity. This is done when each and individual track has been checked, edited if necessary and made sure that the stem sounds good as a whole.
How to Export
Before you do any of these steps, make sure you have backed up of your session just in case something goes wrong.
Pro Tools First
Pro Tools First is the young cousin for the industry standard DAW: Pro Tools. It is free with some limitations of course. Although, if you have what it takes, it is easy to bring out the most from those 16 available stereo channels.
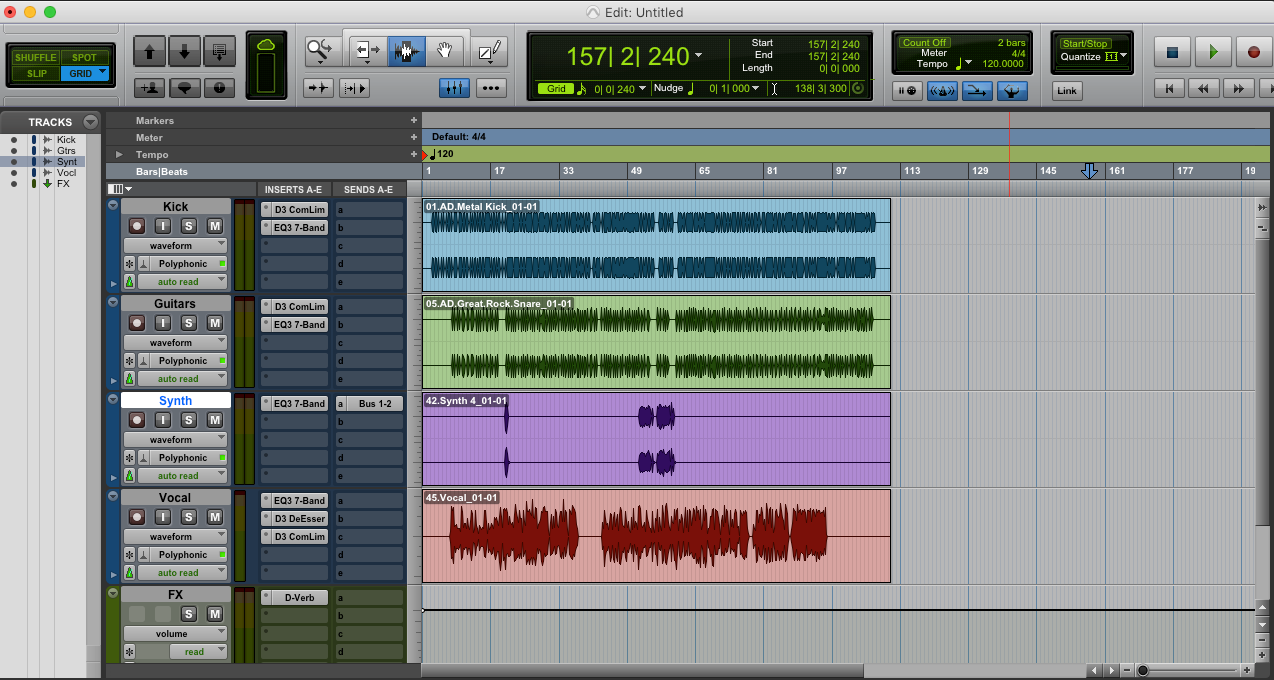
1. Check your edits
-
- Make sure all edits are correct,
- All fades & crossfades sound good
- No clicks or pops
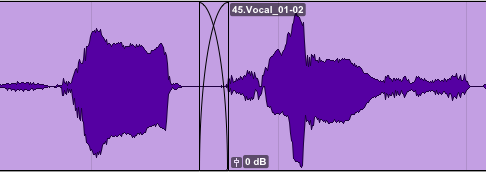
2. Consolidate tracks
- Means all chopped up parts become one. Empty spaces become part of the track too if it is part of the selection.
- Important to have all tracks start at the same location, so it is best practice to start selection from time 0.
-
If exporting all tracks:
- Open Edit Window
- Click on the timeline above tracks
- Cmd+A – highlights all tracks
-
For selected tracks only:
- Start with the longest track
- Triple click on a region – this highlights all the track
-
If there is empty space in the beginning:
- Shift + double click on empty space in front of the already highlighted regions.
- Hold shift + click on other tracks you want to export. This will highlight the same length of track as the first (longest).
- Alt + Shift + 3 or Edit -> Consolidate Clip
3. Export
- Sift + Cmd + K
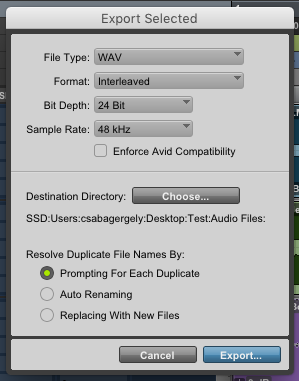
- Brings up the ‘Export Selected’ window.
- Can do the same from the ‘Clips’ sidebar. If you don’t have it already open, it is the little arrow in the bottom right corner. All selected clips will be highlighted. Right click on one of them and Export Clips as Files
- Use WAV and Interleaved format – his will sum up stereo files to one file not two monos.
- Set Bit Depth to 24 Bit and Sample Rate to the same what your project is set to. If not sure check: Setup -> Playback Engine.
To know more about Pro Tools First here are the official help files: click here
GarageBand
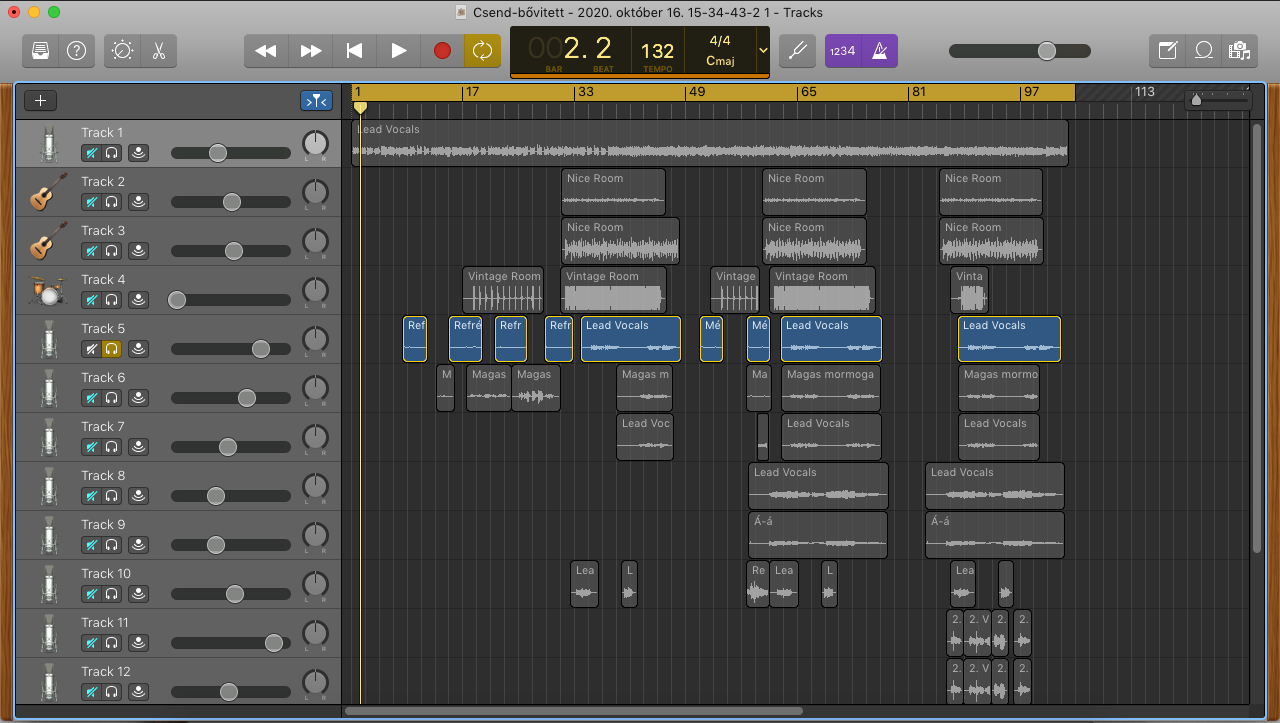
In GarageBand it is not possible to export multiple tracks at once. However, the trick is to solo each track individually and export.
- Solo the first track
-
Set the Cycle Range
- this is the yellow bar at the top of the screen
- for best practice, start at time 0 for all tracks so they’d start at the same location.
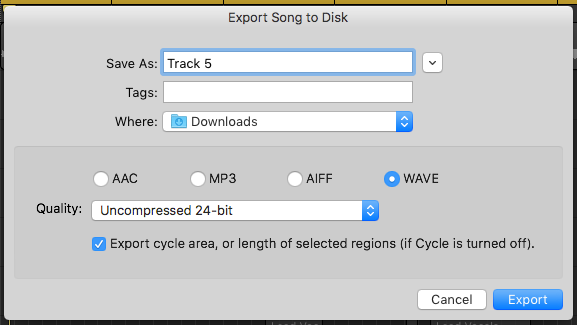
- Click: Share -> Export Song to Disk
- Select WAVE
- Quality: choose this according to your project. If not sure, check under Preferences -> Advanced whether 24 bit is checked or not.
- Click Export
- Repeat for all tracks you wish to export.
Logic Pro
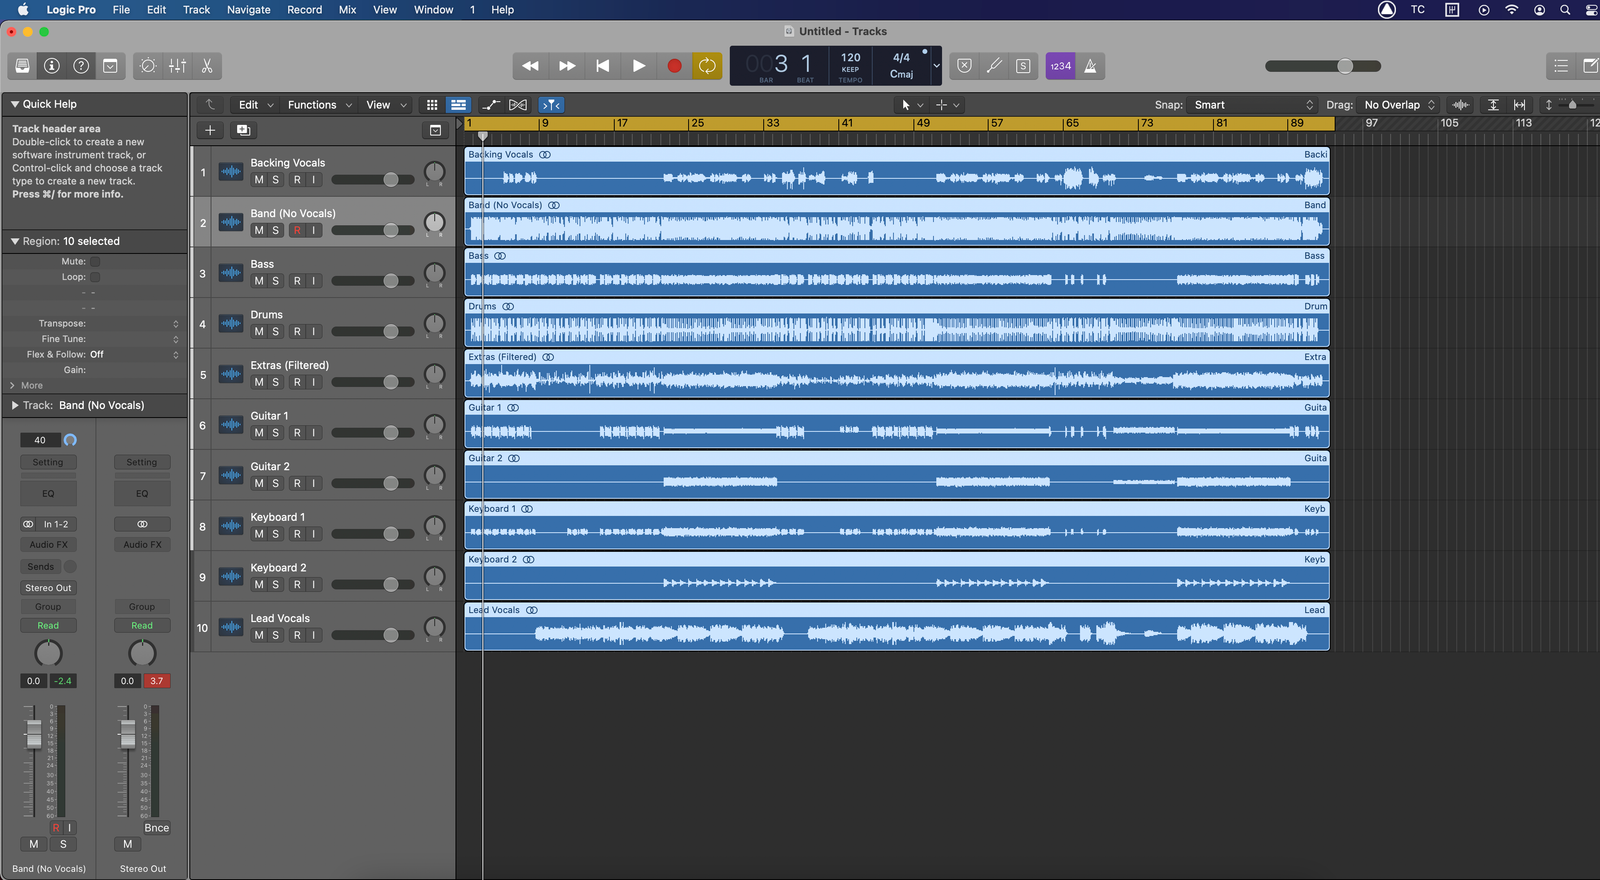
Both Logic and Garageband are developed by Apple, therefore, we will see some similarities. Exporting the song as individual tracks couldn’t be simpler:
- Finalise all your edits.
- Logic will ‘merge’ all your changes and regions within one track and export it as a single file.
- Set the Cyclic Range – the yellow bar at the top.
- This is the length Logic will export.
- Shift+Cmd+E or File -> Export -> All Tracks as Audio Files
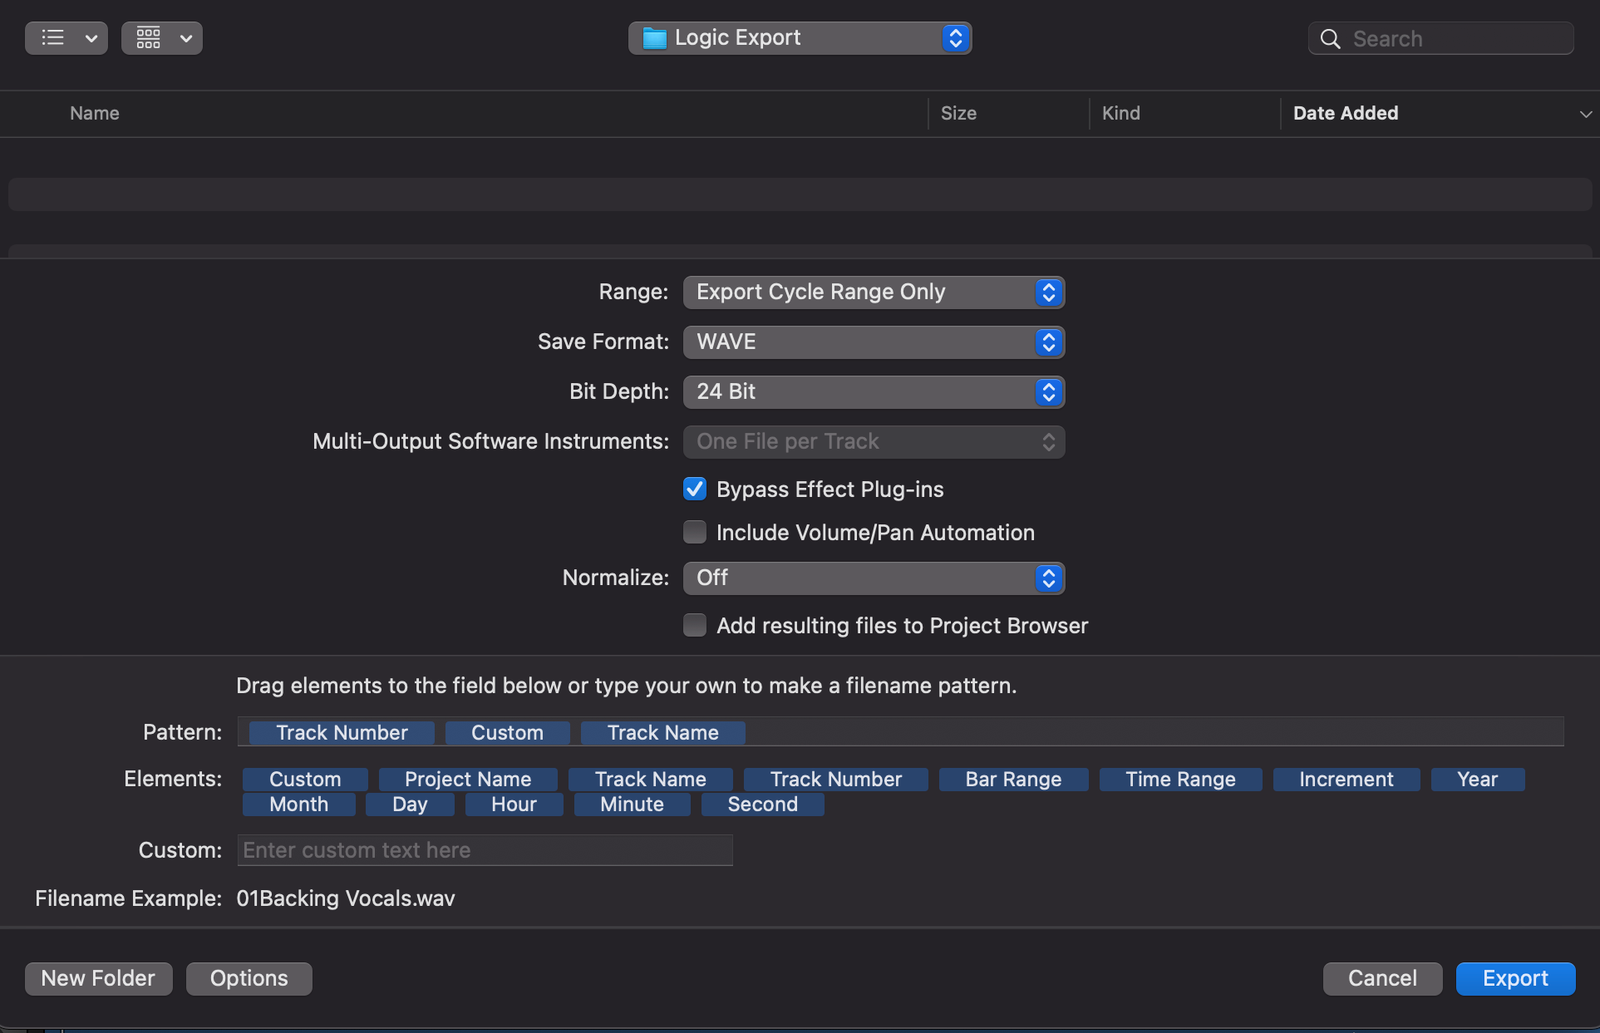
At the top of the popup window set the destination where Logic will export the tracks. Next, set the conditions for the export:
- Range: Export Cycle Range Only
- Save Format: Wave is sort of the standard format
- Bit Depth: Set it to 24 Bit. The way digital audio works, is it takes thousands of samples (ex: 48000 samples) per second. Each of this sample is than converted into 1s and 0s. The bit-depth determines how accurately this sample is taken. 16 bit means 16 1s or 0s are representing a given sample. Example: 1010010011001111. A 24 bit representation of course is more precise. Once it is recorded, you can’t change how the computer captured the files. It only translates a 16 bit representation to 24. Most likely the mixing engineer will mix in 24 bit as all the plugins, reverbs and such create their own internal audio. If you are not sure what you recorded your tracks in: Preferences -> Audio -> Recording. It’s best to have the ’24 Bit Recording’ ticked.
- Bypass Effect Plug-ins: It is best to leave the tracks untouched (box ticked) unless there is a specific sound you are going for where a plugin is essential. Think of atotune, guitar amp plugin etc. In this case, bypass the non-essential plugins and leave the box unticked.
- Include Volume/Pan Automation: Again, it is best to leave this for the mixing engineer.
- Normalise: set it to ‘Off’ as there is no need for it at all. It means it would maximise the volume for each track. We don’t need this at this stage.
Set a desired naming patter and click export.
What’s Next?
Once you have the files saved, zip the folder and send it to the mixing engineer. It is also a good idea to attach a quick demo, with temporary effects, reverbs or other plugins to show how you imagine the song. For this you’ll ned to export a stereo track from your DAW.
Here at the Rusty Rooster Sound you can send us your whole project without any audio export necessary. Just use the ‘Upload Files‘ tab at the top of the page. We are happy to help you out with the edits too and the rest of the decisions. Communication is key for us so at every important stage we’ll contact you.
Need more answers? Get in touch here and we’ll help you figure out your song should you chose us to mix your recordings.